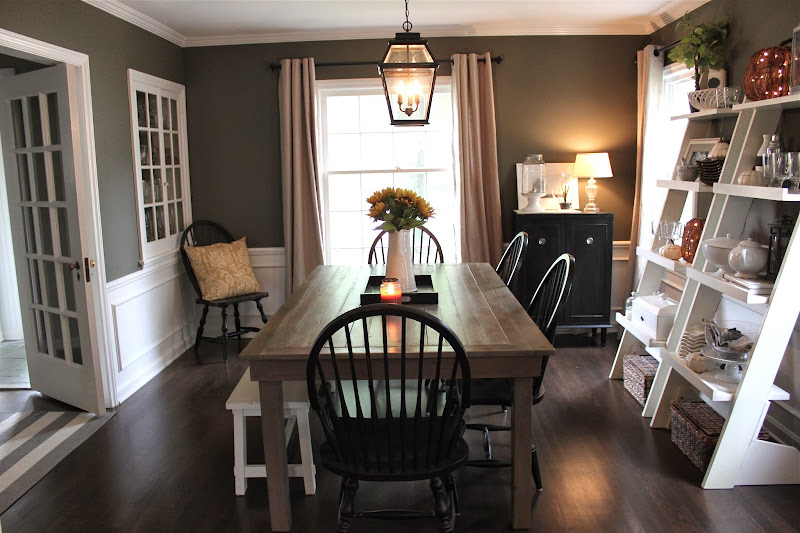
Let me start by saying we had absolutely NO PLANS to do this project this weekend. I'm going to blame it on pregnancy hormones making me super emotional and a well-timed post by
Young House Love. (I'll get to that in second!)
You see, I have always hated this room. It just never sat right with me. The wall color, which was supposed to be a light gray, always looked a little blue and the curtains always looked too yellowish against the white woodwork and blue/gray walls (Ugh!). The couches were ugly hand-me-downs (although
seriously comfortable) and the berber carpet...Ohhhh the carpet. No matter how much I tried I couldn't get it clean enough! We've been talking about replacing it for two years, but I have had design block regarding this room and haven't been able to make a decision I felt comfortable living with the next 10 years. (I really struggle with carpeting! Good thing this was the only room in our house that still had it!)
Anyway, I woke up last Saturday morning, and had a completely meltdown about the room and how it just always felt "dirty" and how I wanted the carpet GONE before the baby comes in February. But I still couldn't make up my mind what to do! Coincidently, this conversation happened over breakfast when I was skimming through Young House Love's blog on my iPad and saw
this post they did about painting their subfloor as a temporary fix. HALLELUJAH!! It was less than 5-minutes after reading that post that I had pliers in my hand and was discreetly pulling back a corner of our rug.
What was underneath was beautiful, beautiful plywood (never thought I'd say that!) Thankfully Evan was on board for being spontaneous (especially since he did virtually all of the work) and we had all the carpeting up and out of the house in 30-minutes!
Once the carpeting was up, we had a decent amount of patching to do using wood filler. I think we went through 3-full tubes of it filling in holes where staples/nails resided and also filling in the small cracks between the pieces of plywood.
Unlike YHL, we decided to rent an orbital sander for the room to get an extra smooth finish. Sanding by hand just seemed too greuling. It cost us $55 to rent the sander from Home Depot for 24-hours, and we spent about $15 on sand paper to go with it. We went over the the floors once with 60-grit paper and then went over it again with 120-grit paper for a fine finish. (Unfortunately the cuff was stuck on the sander we rented and we couldn't angle the handle! Thank goodness it was a small room!)
Before sanding the floors, we decided to re-paint the upper walls. We went with Sherwin William's Van Dyke Brown. I knew that going with a dark brown was a risk and we didn't put that much thought into it ahead of a time, but thought we'd give it a shot! (Very unlike me on both fronts, but like I said this was a spontaneous project!)
Thankfully I loved it :) Then Evan primed the floors. We just love Killz water-based primer, so Evan finished this up while I got out of the house the rest of the day (shopping for baby stuff, of course!).
Once it dried, we painted the floors in Martha Stewart's Flagstone (a semi-gloss Glidden paint) from Home Depot. This is same color as the walls in the adjoining room and kitchen. I thought it would tie the first floor together nicely!
We did two layers of poly-acrylic so far and it makes all the difference! The shine brings it from a painted subfloor to a beautiful, shabby chic floor. Overall, I'm LOVING the result!! It feels like a new room. It is warmer, crisper, and CLEANER!
We originally had planned on doing white stripes on the floor, but I decided I liked it so much just being a solid gray that we are leaving it as is.
Talk about a transformation on a budget! We already had the paint so the whole thing cost us around $100 (sander rental, sand paper, and acrylic).
I can't believe thats all we had to spend to make me so excited and happy about this room! It is something I never would have thought to do or been brave enough to do without John & Sherry's inspiration - SO THANK YOU!!!
Here is one more before and after so you can get the full effect:
I'll keep posting more once the room is finished :) We have some plans in the works in terms of reusing furniture and adding a cushy rug.
(and yes, i'm very excited for the holiday's this year so I had to see how my wreaths looked hung up in the room!)
Stay tuned!


